python OpenCV實現(xiàn)答題卡識別判卷
本文實例為大家分享了python OpenCV實現(xiàn)答題卡識別判卷的具體代碼,供大家參考,具體內(nèi)容如下
完整代碼:
#導(dǎo)入工具包import numpy as npimport argparseimport imutilsimport cv2 # 設(shè)置參數(shù)ap = argparse.ArgumentParser()ap.add_argument('-i', '--image', default='./images/test_03.png', help='path to the input image')args = vars(ap.parse_args()) # 正確答案ANSWER_KEY = {0: 1, 1: 4, 2: 0, 3: 3, 4: 1} def order_points(pts): # 一共4個坐標(biāo)點 rect = np.zeros((4, 2), dtype = 'float32') # 按順序找到對應(yīng)坐標(biāo)0123分別是 左上,右上,右下,左下 # 計算左上,右下 s = pts.sum(axis = 1) rect[0] = pts[np.argmin(s)] rect[2] = pts[np.argmax(s)] # 計算右上和左下 diff = np.diff(pts, axis = 1) rect[1] = pts[np.argmin(diff)] rect[3] = pts[np.argmax(diff)] return rect def four_point_transform(image, pts): # 獲取輸入坐標(biāo)點 rect = order_points(pts) (tl, tr, br, bl) = rect # 計算輸入的w和h值 widthA = np.sqrt(((br[0] - bl[0]) ** 2) + ((br[1] - bl[1]) ** 2)) widthB = np.sqrt(((tr[0] - tl[0]) ** 2) + ((tr[1] - tl[1]) ** 2)) maxWidth = max(int(widthA), int(widthB)) heightA = np.sqrt(((tr[0] - br[0]) ** 2) + ((tr[1] - br[1]) ** 2)) heightB = np.sqrt(((tl[0] - bl[0]) ** 2) + ((tl[1] - bl[1]) ** 2)) maxHeight = max(int(heightA), int(heightB)) # 變換后對應(yīng)坐標(biāo)位置 dst = np.array([ [0, 0], [maxWidth - 1, 0], [maxWidth - 1, maxHeight - 1], [0, maxHeight - 1]], dtype = 'float32') # 計算變換矩陣 M = cv2.getPerspectiveTransform(rect, dst) warped = cv2.warpPerspective(image, M, (maxWidth, maxHeight)) # 返回變換后結(jié)果 return warpeddef sort_contours(cnts, method='left-to-right'): reverse = False i = 0 if method == 'right-to-left' or method == 'bottom-to-top':reverse = True if method == 'top-to-bottom' or method == 'bottom-to-top':i = 1 boundingBoxes = [cv2.boundingRect(c) for c in cnts] (cnts, boundingBoxes) = zip(*sorted(zip(cnts, boundingBoxes),key=lambda b: b[1][i], reverse=reverse)) return cnts, boundingBoxesdef cv_show(name,img):cv2.imshow(name, img)cv2.waitKey(0)cv2.destroyAllWindows() # 預(yù)處理image = cv2.imread(args['image'])contours_img = image.copy()gray = cv2.cvtColor(image, cv2.COLOR_BGR2GRAY)blurred = cv2.GaussianBlur(gray, (5, 5), 0)cv_show(’blurred’,blurred)edged = cv2.Canny(blurred, 75, 200)cv_show(’edged’,edged) # 輪廓檢測cnts = cv2.findContours(edged.copy(), cv2.RETR_EXTERNAL, cv2.CHAIN_APPROX_SIMPLE)[0]cv2.drawContours(contours_img,cnts,-1,(0,0,255),3) cv_show(’contours_img’,contours_img)docCnt = None # 確保檢測到了if len(cnts) > 0: # 根據(jù)輪廓大小進(jìn)行排序 cnts = sorted(cnts, key=cv2.contourArea, reverse=True) # 遍歷每一個輪廓 for c in cnts: # 近似 peri = cv2.arcLength(c, True) approx = cv2.approxPolyDP(c, 0.02 * peri, True) # 準(zhǔn)備做透視變換 if len(approx) == 4: docCnt = approx break # 執(zhí)行透視變換 warped = four_point_transform(gray, docCnt.reshape(4, 2))cv_show(’warped’,warped)# Otsu’s 閾值處理thresh = cv2.threshold(warped, 0, 255, cv2.THRESH_BINARY_INV | cv2.THRESH_OTSU)[1] cv_show(’thresh’,thresh)thresh_Contours = thresh.copy()# 找到每一個圓圈輪廓cnts = cv2.findContours(thresh.copy(), cv2.RETR_EXTERNAL, cv2.CHAIN_APPROX_SIMPLE)[0]cv2.drawContours(thresh_Contours,cnts,-1,(0,0,255),3) cv_show(’thresh_Contours’,thresh_Contours)questionCnts = [] # 遍歷for c in cnts: # 計算比例和大小 (x, y, w, h) = cv2.boundingRect(c) ar = w / float(h) # 根據(jù)實際情況指定標(biāo)準(zhǔn) if w >= 20 and h >= 20 and ar >= 0.9 and ar <= 1.1: questionCnts.append(c) # 按照從上到下進(jìn)行排序questionCnts = sort_contours(questionCnts, method='top-to-bottom')[0]correct = 0 # 每排有5個選項for (q, i) in enumerate(np.arange(0, len(questionCnts), 5)): # 排序 cnts = sort_contours(questionCnts[i:i + 5])[0] bubbled = None # 遍歷每一個結(jié)果 for (j, c) in enumerate(cnts): # 使用mask來判斷結(jié)果 mask = np.zeros(thresh.shape, dtype='uint8') cv2.drawContours(mask, [c], -1, 255, -1) #-1表示填充 cv_show(’mask’,mask) # 通過計算非零點數(shù)量來算是否選擇這個答案 mask = cv2.bitwise_and(thresh, thresh, mask=mask) total = cv2.countNonZero(mask) # 通過閾值判斷 if bubbled is None or total > bubbled[0]: bubbled = (total, j) # 對比正確答案 color = (0, 0, 255) k = ANSWER_KEY[q] # 判斷正確 if k == bubbled[1]: color = (0, 255, 0) correct += 1 # 繪圖 cv2.drawContours(warped, [cnts[k]], -1, color, 3) score = (correct / 5.0) * 100print('[INFO] score: {:.2f}%'.format(score))cv2.putText(warped, '{:.2f}%'.format(score), (10, 30), cv2.FONT_HERSHEY_SIMPLEX, 0.9, (0, 0, 255), 2)cv2.imshow('Original', image)cv2.imshow('Exam', warped)cv2.waitKey(0)
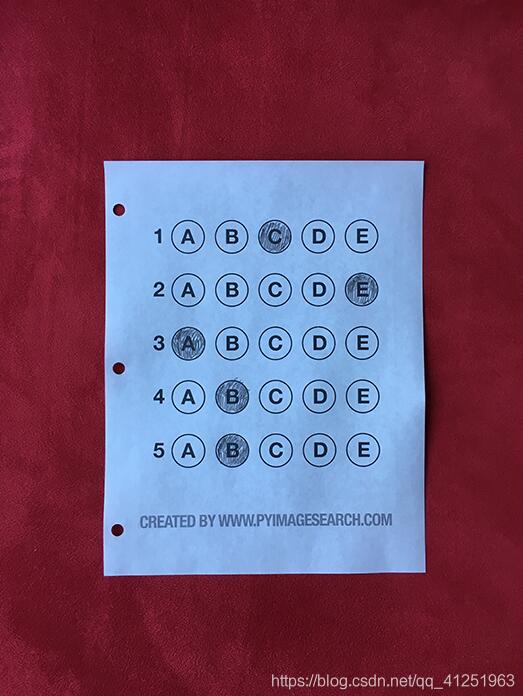
test_03.png
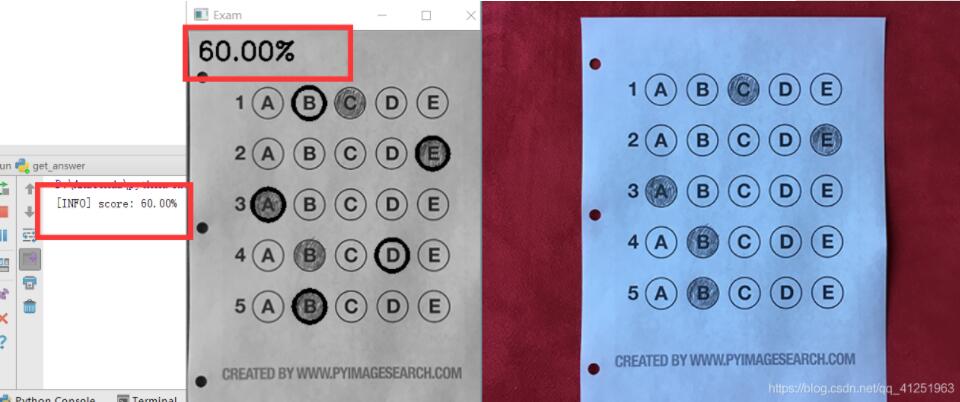
運行效果:


以上就是本文的全部內(nèi)容,希望對大家的學(xué)習(xí)有所幫助,也希望大家多多支持好吧啦網(wǎng)。
相關(guān)文章:
1. Python 合并拼接字符串的方法2. Linux刪除系統(tǒng)自帶版本Python過程詳解3. Python3 json模塊之編碼解碼方法講解4. Python 制作查詢商品歷史價格的小工具5. python 使用事件對象asyncio.Event來同步協(xié)程的操作6. ASP基礎(chǔ)知識VBScript基本元素講解7. ASP.NET MVC使用jQuery ui的progressbar實現(xiàn)進(jìn)度條8. Python 利用Entrez庫篩選下載PubMed文獻(xiàn)摘要的示例9. Python sublime安裝及配置過程詳解10. Python插件機制實現(xiàn)詳解

 網(wǎng)公網(wǎng)安備