SpringBoot整合MyBatis超詳細教程
前面一篇提到了SpringBoot整合基礎的數據源JDBC、Druid操作,實際項目中更常用的還是MyBatis框架,而SpringBoot整合MyBatis進行CRUD也非常方便。
下面從配置模式、注解模式、混合模式三個方面進行說明MyBatis與SpringBoot的整合。
1.1.配置模式MyBatis配置模式是指使用mybatis配置文件的方式與SpringBoot進行整合,相對應的就有mybatis-config.xml(用于配置駝峰命名,也可以省略這個文件)、XxxMapper.xml文件。
主要步驟為:
導入mybatis官方starter 編寫mapper接口。標準@Mapper注解 編寫sql映射文件并綁定mapper接口在application.yaml中指定Mapper配置文件的位置,以及指定全局配置文件的信息 (建議;配置在mybatis.configuration中,可以省略mybatis-config.xml文件)
下面是具體整合配置步驟:
①引入相關依賴pom.xml配置:
pom.xml
<dependencies><dependency> <groupId>org.springframework.boot</groupId> <artifactId>spring-boot-starter-web</artifactId></dependency><!--整合mybatis--><dependency> <groupId>org.mybatis.spring.boot</groupId> <artifactId>mybatis-spring-boot-starter</artifactId> <version>2.1.4</version></dependency><dependency> <groupId>mysql</groupId> <artifactId>mysql-connector-java</artifactId> <scope>runtime</scope></dependency><dependency> <groupId>org.springframework.boot</groupId> <artifactId>spring-boot-devtools</artifactId> <scope>runtime</scope> <optional>true</optional></dependency><dependency> <groupId>org.projectlombok</groupId> <artifactId>lombok</artifactId> <optional>true</optional></dependency><dependency> <groupId>org.springframework.boot</groupId> <artifactId>spring-boot-starter-test</artifactId> <scope>test</scope></dependency> </dependencies> <build><plugins> <plugin><groupId>org.springframework.boot</groupId><artifactId>spring-boot-maven-plugin</artifactId><configuration> <excludes><exclude> <groupId>org.projectlombok</groupId> <artifactId>lombok</artifactId></exclude> </excludes></configuration> </plugin></plugins> </build>
②編寫對應Mapper接口:
@Mapper //這個注解表示了這個類是一個mybatis的mapper接口類@Repositorypublic interface UserMapper { //@Select('select * from user') List<User> findAllUsers(); //@Insert('insert into user(id, username, password) values (#{id}, #{username}, #{password})') void insert(User user); //@Update('update user set username = #{username}, password = #{password} where id = #{id}') void update(User user); //@Delete('delete from user where id = #{id}') void deleteById(Integer id);}
③在resources下創建對應的mapper文件,對應domain類,數據庫表單如下:
User類:
@Datapublic class User { private Integer id; private String username; private String password;}
數據庫user表:

UserMapper.xml文件:
<?xml version='1.0' encoding='UTF-8' ?><!DOCTYPE mapper PUBLIC '-//mybatis.org//DTD Mapper 3.0//EN' 'http://mybatis.org/dtd/mybatis-3-mapper.dtd'><!--namespace表示當前mapper的唯一標識:一般使用domain的全路徑名+Mapper來命名--><mapper namespace='com.fengye.springboot_mybatis.mapper.UserMapper'> <!--id:方法表示,一般配置對應的方法;resultType:表示該方法有返回,返回需要封裝到對應實體的類型--> <select resultType='com.fengye.springboot_mybatis.entity.User'>select * from user </select> <insert parameterType='com.fengye.springboot_mybatis.entity.User'>insert into user(id, username, password) values (#{id}, #{username}, #{password}) </insert> <update parameterType='com.fengye.springboot_mybatis.entity.User'>update user set username = #{username}, password = #{password} where id = #{id} </update> <delete parameterType='Integer'>delete from user where id = #{id} </delete></mapper>
④對應配置application.yml文件:
application.yml
server: port: 8083spring: datasource: username: root password: admin #假如時區報錯,增加時區配置serverTimezone=UTC url: jdbc:mysql://localhost:3306/mybatis02_0322?serverTimezone=UTC&useUnicode=true&characterEncoding=utf-8 driver-class-name: com.mysql.cj.jdbc.Drivermybatis: #config-location: classpath:mybatis/mybatis-config.xml 使用了configuration注解則無需再指定mybatis-config.xml文件 mapper-locations: classpath:mybatis/mapper/*.xml configuration: #指定mybatis全局配置文件中的相關配置項 map-underscore-to-camel-case: true1.2.注解模式
注解模式使用
主要步驟:
導入mybatis官方依賴 注解方式編寫mapper接口 在application.yaml中指定Mapper配置文件的位置,以及指定全局配置文件的信息可以看到注解模式比配置模式少了編寫Mapper.xml文件,簡化了簡單SQL語句的xml文件編寫。
下面是具體整合步驟:
①創建測試表單city,對應domain類:
建表sql:
CREATE TABLE city( id INT(11) PRIMARY KEY AUTO_INCREMENT, name VARCHAR(30), state VARCHAR(30), country VARCHAR(30));
City類:
@Datapublic class City { private Long id; private String name; private String state; private String country;}
②導入pom.xml與配置模式相同,編寫注解式CityMapper接口:
@Mapper@Repositorypublic interface CityMapper { @Select('select * from city where id = #{id}') public City getCityById(Long id); /** * 使用@Options來增加除Insert語句中其它可選參數,比如插入獲取id主鍵的值 * @param city */ @Insert('insert into city(name, state, country) values (#{name}, #{state}, #{country})') @Options(useGeneratedKeys = true, keyProperty = 'id') public void insert(City city); @Update('update city set name = #{name}, state = #{state}, country = #{country} where id = #{id}') public void update(City city); @Delete('delete from city where id = #{id}') public void deleteById(Long id);}
③編寫Service層、Controller層:
Service相關:
public interface CityService { City findCityById(Long id); void insert(City city); void update(City city); void deleteById(Long id);}@Servicepublic class CityServiceImpl implements CityService { @Autowired private CityMapper cityMapper; @Override public City findCityById(Long id) {return cityMapper.getCityById(id); } @Override public void insert(City city) {cityMapper.insert(city); } @Override public void update(City city) {cityMapper.update(city); } @Override public void deleteById(Long id) {cityMapper.deleteById(id); }}
Controller相關:
@RestController@RequestMapping('/city/api')public class CityController { @Autowired private CityService cityService; @RequestMapping('/findCityById/{id}') public City findCityById(@PathVariable('id') Long id){return cityService.findCityById(id); } @PostMapping('/insert') public String insert(City city){cityService.insert(city);return 'insert ok'; } @PostMapping('/update') public String update(City city){cityService.update(city);return 'update ok'; } @GetMapping('/delete/{id}') public String delete(@PathVariable('id') Long id){cityService.deleteById(id);return 'delete ok'; }}
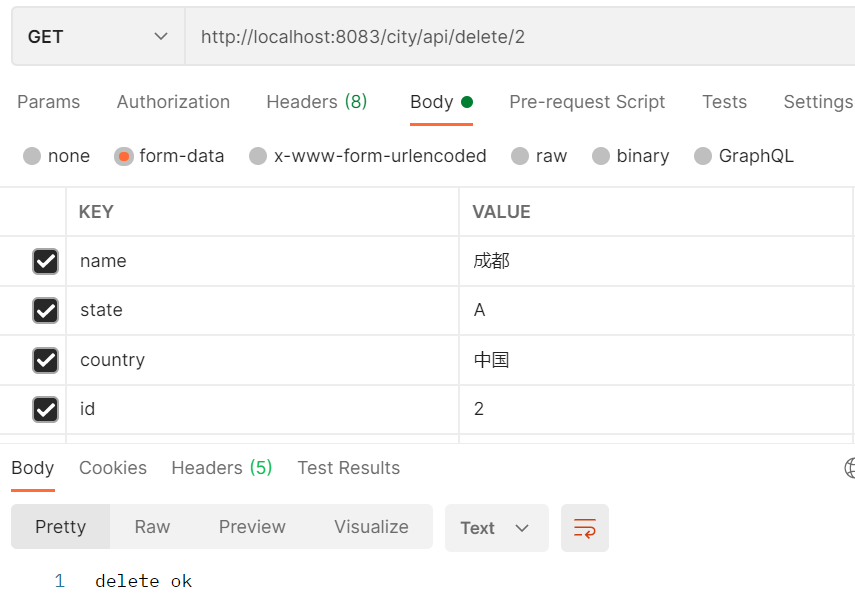
④對應使用Postman接口進行測試:
簡單模擬接口POST/GET請求即可:
在實際項目開發中涉及很多復雜業務及連表查詢SQL,可以配合使用注解與配置模式,達到最佳實踐的目的。
實際項目操作步驟:
引入mybatis-starter 配置application.yaml中,指定mapper-location位置即可 編寫Mapper接口并標注@Mapper注解 簡單方法直接注解方式 復雜方法編寫mapper.xml進行綁定映射 主啟動類上使用@MapperScan('com.fengye.springboot_mybatis.mapper') 簡化Mapper接口,包下所有接口就可以不用標注@Mapper注解具體配置如下:
@SpringBootApplication//主啟動類上標注,在XxxMapper中可以省略@Mapper注解@MapperScan('com.fengye.springboot_mybatis.mapper')public class SpringbootMybatisApplication { public static void main(String[] args) {SpringApplication.run(SpringbootMybatisApplication.class, args); }}@Repositorypublic interface CityMapper { @Select('select * from city where id = #{id}') public City getCityById(Long id); /** * 使用@Options來增加除Insert語句中其它可選參數,比如插入獲取id主鍵的值 * @param city */ @Insert('insert into city(name, state, country) values (#{name}, #{state}, #{country})') @Options(useGeneratedKeys = true, keyProperty = 'id') public void insert(City city); @Update('update city set name = #{name}, state = #{state}, country = #{country} where id = #{id}') public void update(City city); @Delete('delete from city where id = #{id}') public void deleteById(Long id);}
本博客參考寫作文檔:
SpringBoot2核心技術與響應式編程
博客涉及代碼示例均已上傳至github地址:
SpringBootStudy
到此這篇關于SpringBoot整合MyBatis超詳細教程的文章就介紹到這了,更多相關SpringBoot整合MyBatis內容請搜索好吧啦網以前的文章或繼續瀏覽下面的相關文章希望大家以后多多支持好吧啦網!
相關文章:

 網公網安備
網公網安備